Showing posts with label prototyping. Show all posts

Wednesday, December 15, 2021

2021 in the Rearview


I don't know about you, but I'm happy to put 2021 in the rearview mirror.  Yet, despite the many challenges that came over the past 12 months, some recurring positive aspects of my work and professional practice continued to poke through the gloom.

Here are some good things I'll be carrying with me and considering some more in 2022.  (Each title link below brings you to a related 2021 ExhibiTricks post.)


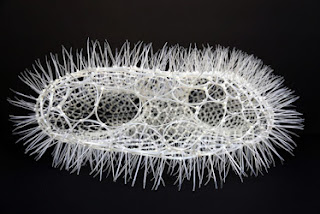
I always enjoy being inspired by and sharing the work of creative folks.  I especially enjoyed the wonderful cable tie sculptures made by Sui Park.


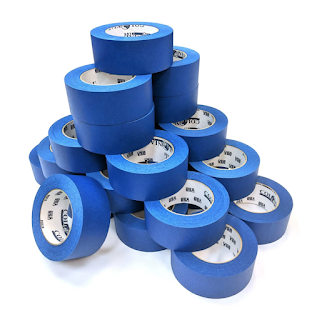
Taking a little time to prototype and test ideas is such an important part of making great exhibits, but so often overlooked or "rationalized" away.  Make a New Year's resolution to use more TAPE!


Some museums have it, and some don't.  What can you do in 2022 to imbue your work, and the places where you work, with authentic museum spirit?


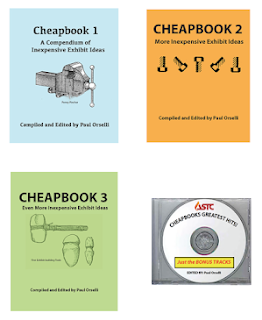
I think one of the major strengths of museum workers is their willingness to share -- their ideas, their time, their hard-won lessons learned. So I was delighted this year to work with ASTC to release all four volumes of the Exhibit Cheapbooks out into the wild for FREE! (Of course, you can always check out the "Free Exhibit Resources" section of the POW! website for articles, videos, and other cool stuff!)


Here's wishing ExhibiTricks readers and subscribers a happy, healthy, and prosperous 2022!


Don't miss out on any ExhibiTricks posts! It's easy to get updates via email or your favorite news reader. Just click the "Sign up for Free ExhibiTricks Blog Updates" link on the upper right side of the blog.

Paul Orselli writes the posts on ExhibiTricks. Paul likes to combine interesting people, ideas, and materials to make exhibits (and entire museums!) with his company POW! (Paul Orselli Workshop, Inc.) Let's work on a project together!

If you enjoy the blog, you can help keep it free to read and free from ads by supporting ExhibiTricks through our PayPal "Tip Jar"

Wednesday, October 20, 2021

Make Some Paper and Tape Prototypes!

Earlier this month I was delighted to present an exhibit prototyping workshop at the Museums Alaska conference.

Thomas Edison said,  "To invent, you need a good imagination and a pile of junk."  His reference was to inventing, but he could have also been speaking about prototyping.

To me, prototyping is an iterative process that uses simple materials to help you answer questions about the physical aspects of your exhibit components (even labels!) early on in the development process.  

Maybe it's just me, but I can't imagine anyone fabricating an exhibit component without trying out a quick-and-dirty version first.  So in today's post, I thought I'd lay out the simple steps I use to show how quickly and inexpensively prototyping can be integrated into the beginning of any exhibit development process, and how you too can become an Office Supplies Prototyping Superstar!


STEP ONE:  Figure out what you want to find out.

In this case, a client wanted me to come up with an interactive version of a "Food Web" (the complex interrelationship of organisms in a particular environment, showing, basically, what eats what.)  We brainstormed a number of approaches (magnet board, touch screen computer) but finally settled on the notion of allowing visitors to construct a "Food Web Mobile" with the elements being the various organisms found (in this particular case) in a mangrove swamp.  The client was also able to provide me with a flow chart showing the relationships between organisms and a floor plan of the area where the final exhibit will be installed.

The two initial things I wanted to test or find out about from my prototype were:

1) Did people "get" the idea conceptually?  That is, did they understand the relationships and analogies between the Food Web Mobile and the actual organisms in the swamp?

2) Could they easily create different sorts of physical arrangements with the mobile that were interesting and accurate?


STEP TWO: Get out your junk!


As in the Edison quote above, it helps to have a good supply of "bits and bobs" around to prototype with.  You might not have the same sorts of junk that I've gathered up over years in the museum exhibit racket, but everyone should have access to basic office supplies (stuff like paper, tape, markers, index cards, scissors, etc.)  And really that's all you need to start assembling prototypes. (The imagination part is important, too.)


STEP THREE: Start playing around with the pieces ...


Before I even start assembling a complete rough mechanism or system I like to gather all the parts together and see if I like how they work with each other.  In the case of the Food Web Mobile prototype, I used colored file folders to represent different levels of organisms.  I initially made each color/level out of the same size pieces, but then I changed to having each color be a different size.  Finally, I used a hole punch to make the holes and bent paper clips to serve as the hooks that would allow users to connect the pieces/organisms in different ways.


STEP FOUR:  Assemble, then iterate, iterate, iterate!

 
This is the part of the prototyping process that requires other people besides yourself.  Let your kids, your co-workers, your significant other, whoever (as long as it's somebody besides yourself) try out your idea. Obviously, the closer your "testers" are to the expected demographic inside the museum, the better --- ideally I like to prototype somewhere inside the museum itself. 

Resist the urge to explain or over-explain your prototype.  Just watch what people do (or don't do!) with the exhibit component(s).  Take lots of notes/pictures/videos.  Then take a break to change your prototype based on what you've observed and heard, and try it out again.  That's called iteration.


In this case, I saw right away that the mobile spun and balanced in interesting ways, but that meant that the labels would need to be printed on both sides of the pieces.  Fortunately, three young "testers" (ages 6, 11, and 13) seemed to "get" the concept of "Food Webs" embedded into the Mobile interactive, and started coming up with interesting physical variations on their own.


For example, I initially imagined people would just try to create "balanced" arrangements of pieces on the Mobile.  But, as you can see below, the prototype testers enjoyed making "unbalanced" arrangements as well (which is fine, and makes sense conceptually as well.)   Also, we discovered that people realized that they could hang more than one "organism piece" on the lower hooks (which was also fine, and also made sense conceptually.)


STEP FIVE: Figure out what's next ... even if it's the trash can!

Do you need to change the label or some physical arrangement of your prototype?  Using simple, inexpensive materials makes that easy.

Do you just need to throw out this prototype idea?  Using simple, inexpensive materials makes it easier to move on to a new idea, too. (Much more easily than if you had spent weeks crafting and assembling something out of expensive materials from your workshop...)  It's not too surprising to see people really struggle to let a bad exhibit idea go, especially if they've spent several weeks putting it together. Quick and cheap should be your watchwords early on in the prototyping process.

In this case, I sent photos of the paper clip prototype and a short video showing people using the Food Web Mobile to the client as a "proof of concept."  They were quite pleased, and so now I will make a second-level prototype using materials more like those I expect to use in the "final" exhibit (which I'll update in a future post.)  Even so, I will still repeat the steps above of gathering materials, assembling pieces, and iterating through different versions with visitors. 

I hope you'll give this "office supplies" version of exhibit prototyping a try for your next project!

If you'd like me to give a prototyping workshop at your museum, contact me and check out the "Workshops" section of the POW! website to see examples of other workshops I've done for museum groups all over the world!


Don't miss out on any ExhibiTricks posts! It's easy to get updates via email or your favorite news reader. Just click the "Sign up for Free ExhibiTricks Blog Updates" link on the upper right side of the blog.

Paul Orselli writes the posts on ExhibiTricks. Paul likes to combine interesting people, ideas, and materials to make exhibits (and entire museums!) with his company POW! (Paul Orselli Workshop, Inc.) Let's work on a project together!

If you enjoy the blog, you can help keep it free to read and free from ads by supporting ExhibiTricks through our PayPal "Tip Jar"

Wednesday, June 5, 2019

Hone Your Prototyping Skills By Becoming an Office Supply Ninja!


Thomas Edison said,  "To invent, you need a good imagination and a pile of junk."  His reference was to inventing, but he could have also been speaking about prototyping.

To me, prototyping is an iterative process that uses simple materials to help you answer questions about the physical aspects of your exhibit components (even labels!) early on in the development process.  

As I mentioned in a previous post, it's always a bit discouraging to hear museum folks say "we just don't have the time/the money/the space/the materials to do prototyping ..."  (By then I'm usually thinking "So how is setting an ill-conceived or malfunctioning exhibit component into your museum, because you didn't prototype, saving time or money?"  But I digress...)


Maybe it's just me, but I can't imagine anyone fabricating an exhibit component without trying out a quick-and-dirty version first.  So in today's post, I thought I'd lay out the simple steps I use to show how quickly and inexpensively prototyping can be integrated into the beginning of any exhibit development process, and how you too can become an Office Supply Ninja!


STEP ONE:  Figure out what you want to find out.

In this case, a client wanted me to come up with an interactive version of a "Food Web" (the complex interrelationship of organisms in a particular environment, showing, basically, what eats what.)  We brainstormed a number of approaches (magnet board, touch screen computer) but finally settled on the notion of allowing visitors to construct a "Food Web Mobile" with the elements being the various organisms found (in this particular case) in a mangrove swamp.  The client was also able to provide me with a flow chart showing the relationships between organisms and a floor plan of the area where the final exhibit will be installed.

The two initial things I wanted to test or find out about from my prototype were:

1) Did people "get" the idea conceptually?  That is, did they understand the relationships and analogies between the Food Web Mobile and the actual organisms in the swamp?

2) Could they easily create different sorts of physical arrangements with the mobile that were interesting and accurate?


STEP TWO: Get out your junk!


As in the Edison quote above, it helps to have a good supply of "bits and bobs" around to prototype with.  You might not have the same sorts of junk that I've gathered up over years in the museum exhibit racket, but everyone should have access to basic office supplies (stuff like paper, tape, markers, index cards, scissors, etc.)  And really that's all you need to start assembling prototypes. (The imagination part is important, too.)


STEP THREE: Start playing around with the pieces ...


Before I even start assembling a complete rough mechanism or system I like to gather all the parts together and see if I like how they work with each other.  In the case of the Food Web Mobile prototype, I used colored file folders to represent different levels of organisms.  I initially made each color/level out of the same size pieces, but then I changed to having each color be a different size.  Finally, I used a hole punch to make the holes, and bent paper clips to serves as the hooks that would allow users to connect the pieces/organisms in different ways.


STEP FOUR:  Assemble, then iterate, iterate, iterate!

 
This is the part of the prototyping process that requires other people in addition to yourself.  Let your kids, your co-workers, your significant other, whoever (as long as it's somebody besides yourself) try out your idea. Obviously, the closer your "testers" are to the expected demographic inside the museum, the better --- ideally I like to prototype somewhere inside the museum itself. 

Resist the urge to explain or over-explain your prototype.  Just watch what people do (or don't do!) with the exhibit component(s).  Take lots of notes/pictures/video.  Then take a break to change your prototype based on what you've observed and heard, and try it out again.  That's called iteration.


In this case, I saw right away that the mobile spun and balanced in interesting ways, but that meant that the labels would need to be printed on both sides of the pieces.  Fortunately, my three "in-house testers" (ages 6, 11, and 13) seemed to "get" the concept of "Food Webs" embedded into the Mobile interactive, and started coming up with interesting physical variations on their own.


For example, I initially imagined people would just try to create "balanced" arrangements of pieces on the Mobile.  But, as you can see below, the prototype testers enjoyed making "unbalanced" arrangements as well (which is fine, and makes sense conceptually as well.)   Also, we discovered that people realized that they could hang more than one "organism piece" on the lower hooks (which was also fine and also made sense conceptually.)


STEP FIVE: Figure out what's next ... even if it's the trash can!

Do you need to change the label or some physical arrangement of your prototype?  Using simple, inexpensive materials makes that easy.

Do you just need to junk this prototype idea?  Using simple, inexpensive materials makes it easier to move on to a new idea, too. (Much more easily than if you had spent weeks crafting and assembling something out of expensive materials from your workshop...)  It's not too surprising to see people really struggle to let a bad exhibit idea go, especially if they've spent several weeks putting it together. Quick and cheap should be your watchwords early on in the prototyping process.

In this case, I sent photos of the paper clip prototype and a short video showing people using the Food Web Mobile to the client as a "proof of concept."  They were quite pleased, and so now I will make a second-level prototype using materials more like those I expect to use in the "final" exhibit (which I'll update in a future post.)  Even so, I will still repeat the steps above of gathering materials, assembling pieces, and iterating through different versions with visitors. 

I hope you'll give this "office supply ninja" version of exhibit prototyping a try for your next project!

If you do, send me an email and I'd be happy to show off the results of ExhibiTricks readers prototyping efforts. 


Don't miss out on any ExhibiTricks posts! It's easy to get updates via email or your favorite news reader. Just click the "Sign up for Free ExhibiTricks Blog Updates" link on the upper right side of the blog.

Paul Orselli writes the posts on ExhibiTricks. Paul is an instigator, in the best sense of that word. He likes to mix up interesting people, ideas, and materials to make both individual museum exhibits and entire museums with his company POW! (Paul Orselli Workshop, Inc.)

If you would like to support the content on ExhibiTricks, please consider making a small donation through our PayPal "Tip Jar"

Friday, April 6, 2018

Back to Tunisia!


I'm off on another museum project  --- this time for my second trip to Tunisia!  I'll be reporting on my Tunisian travels in a future ExhibiTricks blog post, but for now I hope you'll enjoy this "encore" post about my first trip to Tunisia.  You can also check out my Twitter, Facebook, and Instagram feeds for live updates!


My work brings me to many unexpected places around the world, but I just returned from what may be my most interesting trip so far --- working with folks from Libya, but in Tunisia!

So how did I end up in Tunisia?  Earlier this year, I was contacted by Professor Susan Kane of Oberlin College.  Susan told me about her project through the Bureau of Near Eastern Affairs, U.S. Department of State to work with Libyan educators, scout leaders, and museum folks.

The point of this particular project being to bring together Libyans from different parts of the country who work with young people to help foster national reconciliation, and to create a greater appreciation for the importance of Libyan cultural heritage --- both tangible (think historic structures and archaeological sites) as well as intangible (things like music, dance, and poetry.)

Now we need to stop the story to fill in a couple of important details.  First off, given shifting events and unrest in Libya over the past few years, our U.S. Embassy to Libya is currently located in neighboring Tunisia, not Libya (see map below.) So that's why a State Department workshop with participants from Libya was happening in Tunisia.  (Also U.S. citizens are currently advised not to travel to Libya.)


Secondly, why ask ME to give this workshop that, at least partially, concerned itself with cultural heritage and Libyan national reconciliation?  Several kind museum colleagues pointed Susan in my direction, and together we crafted a plan to share my ideas about open-ended activities for children, quick and cheap exhibit prototyping, and developing pop-up or temporary museums in schools and community centers with the workshop participants.

After the initial excitement of traveling to Tunisia wore off, I honestly began to worry --- would my information and activities with simple materials actually be useful to Libyans concerned with reconciliation and cultural heritage? I continued to think about this from the time I started planning activities and gathering materials in the U.S. all the way until I arrived at the hotel on the outskirts of Tunis where the workshops would be held.

Fortunately, the Libyan men and women in my workshop were very enthusiastic and welcoming.  It was clear (once we got into the groove with our helpful translators!) that everyone at the workshop was hungry for activities to share with the students, scouts, and children they worked with.  I deliberately chose topics and activities that I thought could be used in a wide range of situations.


For example, I introduced a number of activities that dealt with the topic of "Structures."  In dealing with open-ended design challenges involving structures we could easily discuss History, Architecture, and Engineering among other subjects.  We created bridges and buildings out of simple supplies like paper, tape, straws, and paper clips.  The workshop participants excitedly shared their own embellishments for activities with each other, and also remarked on the symbolic value of a topic like "bridges" when discussing with children how to work together to create a more united Libya.  (Given the current political climate, maybe I should introduce more bridge-building activities for my workshops in the United States!)


Together with the workshop participants we spent one day focused on how to develop open-ended design activities and another on testing and prototyping ideas. Along the way, I also introduced fun activities like "Laughing Cups" that could quickly engage children and then lead into a broader discussion of cultural heritage topics like Music. (My new Libyan friends in the workshop called these sorts of activities Mr. Paul's "tricks.")

Our last workshop day together dealt with the development of Pop-Up (or temporary) Museums. These sorts of temporary displays or exhibitions are great ways to engage with communities and lend themselves to being set up inside non-museum spaces like schools or community centers (or even under tents outside.)  So we ended our workshop by creating a Pop-Up Museum!


Several workshop participants brought objects from home to share for the Pop-Up Museum, while others put displays together from materials available on-site.  One of my favorite examples of "instant exhibitry" was from Intisar, the director of the Children's Museum in Tripoli, who created a display about the different types of historical tombs found in Libya (clay for lower class, glass for upper class) using leftover chicken bones from lunch and an ashtray from her hotel room!


As with every class or workshop I lead, I learned a lot from the participants and our work together. Perhaps foremost in Tunisia, I learned that the Libyans I met (like all people around the world) want a better life for their children, and a safe and secure place to live.

So can Laughing Cups help Libya? In the hands of the thoughtful and dedicated people I met in Tunisia, I'm sure, in a small way, they can.


Don't miss out on any ExhibiTricks posts! It's easy to get updates via email or your favorite news reader. Just click the "Sign up for Free ExhibiTricks Blog Updates" link on the upper right side of the blog.

P.S. If you receive ExhibiTricks via email (or Facebook or LinkedIn) you will need to click HERE to go to the main ExhibiTricks page to make comments or view multimedia features (like videos!)
Wednesday, March 15, 2017

Can Laughing Cups Help Libya?


My work brings me to many unexpected places around the world, but I just returned from what may be my most interesting trip so far --- working with folks from Libya, but in Tunisia!

So how did I end up in Tunisia?  Earlier this year, I was contacted by Professor Susan Kane of Oberlin College.  Susan told me about her project through the Bureau of Near Eastern Affairs, U.S. Department of State to work with Libyan educators, scout leaders, and museum folks.

The point of this particular project being to bring together Libyans from different parts of the country who work with young people to help foster national reconciliation, and to create a greater appreciation for the importance of Libyan cultural heritage --- both tangible (think historic structures and archaeological sites) as well as intangible (things like music, dance, and poetry.)

Now we need to stop the story to fill in a couple of important details.  First off, given shifting events and unrest in Libya over the past few years, our U.S. Embassy to Libya is currently located in neighboring Tunisia, not Libya (see map below.) So that's why a State Department workshop with participants from Libya was happening in Tunisia.  (Also U.S. citizens are currently advised not to travel to Libya.)


Secondly, why ask ME to give this workshop that, at least partially, concerned itself with cultural heritage and Libyan national reconciliation?  Several kind museum colleagues pointed Susan in my direction, and together we crafted a plan to share my ideas about open-ended activities for children, quick and cheap exhibit prototyping, and developing pop-up or temporary museums in schools and community centers with the workshop participants.

After the initial excitement of traveling to Tunisia wore off, I honestly began to worry --- would my information and activities with simple materials actually be useful to Libyans concerned with reconciliation and cultural heritage? I continued to think about this from the time I started planning activities and gathering materials in the U.S. all the way until I arrived at the hotel on the outskirts of Tunis where the workshops would be held.

Fortunately, the Libyan men and women in my workshop were very enthusiastic and welcoming.  It was clear (once we got into the groove with our helpful translators!) that everyone at the workshop was hungry for activities to share with the students, scouts, and children they worked with.  I deliberately chose topics and activities that I thought could be used in a wide range of situations.


For example, I introduced a number of activities that dealt with the topic of "Structures."  In dealing with open-ended design challenges involving structures we could easily discuss History, Architecture, and Engineering among other subjects.  We created bridges and buildings out of simple supplies like paper, tape, straws, and paper clips.  The workshop participants excitedly shared their own embellishments for activities with each other, and also remarked on the symbolic value of a topic like "bridges" when discussing with children how to work together to create a more united Libya.  (Given the current political climate, maybe I should introduce more bridge-building activities for my workshops in the United States!)


Together with the workshop participants we spent one day focused on how to develop open-ended design activities and another on testing and prototyping ideas. Along the way, I also introduced fun activities like "Laughing Cups" that could quickly engage children and then lead into a broader discussion of cultural heritage topics like Music. (My new Libyan friends in the workshop called these sorts of activities Mr. Paul's "tricks.")

Our last workshop day together dealt with the development of Pop-Up (or temporary) Museums. These sorts of temporary displays or exhibitions are great ways to engage with communities and lend themselves to being set up inside non-museum spaces like schools or community centers (or even under tents outside.)  So we ended our workshop by creating a Pop-Up Museum!


Several workshop participants brought objects from home to share for the Pop-Up Museum, while others put displays together from materials available on-site.  One of my favorite examples of "instant exhibitry" was from Intisar, the director of the Children's Museum in Tripoli, who created a display about the different types of historical tombs found in Libya (clay for lower class, glass for upper class) using leftover chicken bones from lunch and an ashtray from her hotel room!


As with every class or workshop I lead, I learned a lot from the participants and our work together. Perhaps foremost in Tunisia, I learned that the Libyans I met (like all people around the world) want a better life for their children, and a safe and secure place to live.

So can Laughing Cups help Libya? In the hands of the thoughtful and dedicated people I met in Tunisia, I'm sure, in a small way, they can.


Don't miss out on any ExhibiTricks posts! It's easy to get updates via email or your favorite news reader. Just click the "Sign up for Free ExhibiTricks Blog Updates" link on the upper right side of the blog.

P.S. If you receive ExhibiTricks via email (or Facebook or LinkedIn) you will need to click HERE to go to the main ExhibiTricks page to make comments or view multimedia features (like videos!)
Thursday, February 23, 2017

Add "Office Supply Ninja" to Your Exhibit Prototyping Resume


Thomas Edison said,  "To invent, you need a good imagination and a pile of junk."  His reference was to inventing, but he could have also been speaking about prototyping.

To me, prototyping is an iterative process that uses simple materials to help you answer questions about the physical aspects of your exhibit components (even labels!) early on in the development process.  

As I mentioned in a previous post, it's always a bit discouraging to hear museum folks say "we just don't have the time/the money/the space/the materials to do prototyping ..."  (By then I'm usually thinking "So how is setting an ill-conceived or malfunctioning exhibit component into your museum, because you didn't prototype, saving time or money?"  But I digress...)

Maybe it's just me, but I can't imagine anyone fabricating an exhibit component without trying out a quick-and-dirty version first.  So in today's post I thought I'd lay out the simple steps I use to show how quickly and inexpensively prototyping can be integrated into the beginning of any exhibit development process, and how you too can become an Office Supply Ninja!


STEP ONE:  Figure out what you want to find out.

In this case, a client wanted me to come up with an interactive version of a "Food Web" (the complex interrelationship of organisms in a particular environment, showing, basically, what eats what.)  We brainstormed a number of approaches (magnet board, touch screen computer) but finally settled on the notion of allowing visitors to construct a "Food Web Mobile" with the elements being the various organisms found (in this particular case) in a mangrove swamp.  The client was also able to provide me with a flow chart showing the relationships between organisms and a floor plan of the area where the final exhibit will be installed.

The two initial things I wanted to test or find out about from my prototype were:

1) Did people "get" the idea conceptually?  That is, did they understand the relationships and analogies between the Food Web Mobile and the actual organisms in the swamp?

2) Could they easily create different sorts of physical arrangements with the mobile that were interesting and accurate?


STEP TWO: Get out your junk!


As in the Edison quote above, it helps to have a good supply of "bits and bobs" around to prototype with.  You might not have the same sorts of junk that I've gathered up over years in the museum exhibit racket, but everyone should have access to basic office supplies (stuff like paper, tape, markers, index cards, scissors, etc.)  And really that's all you need to start assembling prototypes. (The imagination part is important, too.)


STEP THREE: Start playing around with the pieces ...


Before I even start assembling a complete rough mechanism or system I like to gather all the parts together and see if I like how they work with each other.  In the case of the Food Web Mobile prototype, I used colored file folders to represent different levels of organisms.  I initially made each color/level out of the same size pieces, but then I changed to having each color be a different size.  Finally, I used a hole punch to make the holes, and bent paper clips to serves as the hooks that would allow users to connect the pieces/organisms in different ways.


STEP FOUR:  Assemble, then iterate, iterate, iterate!


This is the part of the prototyping process that requires other people beside yourself.  Let your kids, your co-workers, your significant other, whoever (as long as it's somebody beside yourself) try out your idea. Obviously the closer your "testers" are to the expected demographic inside the museum, the better --- ideally I like to prototype somewhere inside the museum itself. 

Resist the urge to explain or over-explain your prototype.  Just watch what people do (or don't do!) with the exhibit component(s).  Take lots of notes/pictures/video.  Then take a break to change your prototype based on what you've observed and heard, and try it out again.  That's called iteration.

In this case, I saw right away that the mobile spun and balanced in interesting ways, but that meant that the labels would need to be printed on both sides of the pieces.  Fortunately, my three "in-house testers" (ages 6, 11, and 13) seemed to "get" the concept of "Food Webs" embedded into the Mobile interactive, and started coming up with interesting physical variations on their own.

For example, I initially imagined people would just try to create "balanced" arrangements of pieces on the Mobile.  But, as you can see below, the prototype testers enjoyed making "unbalanced" arrangements as well (which is fine, and makes sense conceptually as well.)   Also, we discovered that people realized that they could hang more than one "organism piece" on the lower hooks (which was also fine, and also made sense conceptually.)


STEP FIVE: Figure out what's next ... even if it's the trash can!

Do you need to change the label, or some physical arrangement of your prototype?  Using simple, inexpensive materials makes that easy.

Do you just need to junk this prototype idea?  Using simple, inexpensive materials makes it easier to move on to a new idea, too. (Much more easily than if you had spent weeks crafting and assembling something out of expensive materials from your workshop...)  It's not too surprising to see people really struggle to let a bad exhibit idea go, especially if they've spent several weeks putting it together. Quick and cheap should be your watchwords early on in the prototyping process.

In this case, I sent photos of the paper clip prototype and a short video showing people using the Food Web Mobile to the client as a "proof of concept."  They were quite pleased, and so now I will make a second-level prototype using materials more like those I expect to use in the "final" exhibit (which I'll update in a future post.)  Even so, I will still repeat the steps above of gathering materials, assembling pieces, and iterating through different versions with visitors. 

I hope you'll give this "office supply ninja" version of exhibit prototyping a try for your next project!

If you do, send me an email and I'd be happy to show off the results of ExhibiTricks readers prototyping efforts.


Don't miss out on any ExhibiTricks posts! It's easy to get updates via email or your favorite news reader. Just click the "Sign up for Free ExhibiTricks Blog Updates" link on the upper right side of the blog.

P.S. If you receive ExhibiTricks via email (or Facebook or LinkedIn) you will need to click HERE to go to the main ExhibiTricks page to make comments or view multimedia features (like videos!)

Wednesday, September 25, 2013

30 Mini Hands-On Exhibits, 2 Weeks, 1 Portable STEM Museum

This week's post about an interesting exhibit approach is courtesy of Winifred Kehl.

Winifred is a science writer and museum exhibit developer who specializes in informal science education. She especially loves creative projects that help people engage with science & scientists (and vice versa!). You can find her online at www.winifredkehl.com.


How do you come up with, prototype, and launch 30 hands-on science exhibits in 2 weeks?

More importantly – why? Why would any exhibit designer do this to themselves? Because it’s worth the crazy-making!

A couple months ago I read about the Uni Project on AAM’s blog.  Based in New York, the Uni Project is a portable reading room made up of lightweight cubes that lock together to form a freestanding bookshelf. Local libraries and museums have “curated” cubes, selecting and donating books. The Uni can be deployed in almost any public space – library common rooms, parks, etc. – and anyone can walk up, borrow a book, and sit down on one of the Uni’s portable benches to read. The idea behind the Uni Project is to showcase learning – make it visible! And encourage people to do more of it.

I loved the idea immediately. I contacted the creators about getting a Uni Project started in Seattle, Washington. It turned out that another group in Seattle – the Foundation for Early Learning – was interested in starting a Seattle Uni Project. Both FEL and I were interested in creating a STEM-themed Uni Project (that’s Science, Technology, Engineering & Math). They had already purchased the physical structure for a Uni Project and were looking for someone to curate activities for the cubes. The only catch – they needed to launch a prototype in just 2 weeks.

It’s a good thing that everyone agreed the launch would be a prototype, because this was a learning process for all of us. We brainstormed a list of age-appropriate STEM activities that might work in the Uni format, adapted from books and educational websites. I rounded up my craft supplies, dusted off my hot glue gun, and started building prototypes.

I quickly gained a renewed appreciation for mommy bloggers – they made it look so easy! Their model of a jellyfish made out of a plastic grocery bag looked so real it convinced me until I read the caption. Mine looked like a sad, failed kindergarten craft project.


“A” for effort… maybe.

Soon, craft supplies exploded over my entire living room. Felt, thread, buttons, and velcro crept from the table, across the floor, and over the couch.


At some point there just wasn’t time to fiddle with the prototypes anymore (that point was late in the evening before we launched). In the morning, we packed everything up and hauled it to a plaza in the middle of downtown Seattle.

Despite a classic Seattle drizzle, quite a few people were interested to see what we were setting up. After the canopy was up and the portable cubbies filled with activities, it didn’t take long for curious passers-by and families to explore our Uni cubes.

Some of our activities were obvious duds. The model of the Earth had very little interpretation, and wasn’t much fun to play with by itself. I suppose we should have seen that coming. Other activities were instant hits. The “dinosaur dig” boxes – clear Tupperware tubs filled with lentils, fake dinosaur bones, and paint brushes for “excavation” – were in high demand. (As a veteran of a few Dino Days at the Burke Museum, I had anticipated these being popular, and made two.) Other activities surprised us – the “balloon rocketship” activity was neglected in its box until the volunteers set up a demonstration and started helping kids tape their balloons to the straw and launch them. Suddenly, kids couldn’t get enough of it, and the volunteers were busy for the rest of the afternoon launching balloon rockets.


As the rain increased later in the afternoon, our audience melted away, but overall the launch seemed pretty successful. We managed to get some comment cards on what our visitors felt worked and what didn’t, and came away with positive reviews and a lot of ideas to improve the activities. The main observation I made during the afternoon was that parents needed much more detailed instructions than what we assumed they’d need. Our activities weren’t always as self-explanatory as we had thought they would be.

The FEL STEM Uni has since been deployed several times around Puget Sound.  I am eagerly awaiting another chance to see it in action. It will be interesting to see how the project matures.


Thanks Winifred, for sharing your experiences with the Uni Project approach!


Don't miss out on any ExhibiTricks posts! It's easy to get updates via email or your favorite news reader. Just click the "Sign up for Free ExhibiTricks Blog Updates" link on the upper right side of the blog.

P.S. If you receive ExhibiTricks via email (or Facebook or LinkedIn) you will need to click HERE to go to the main ExhibiTricks page to make comments or view multimedia features (like videos!)
Tuesday, July 16, 2013

Letter from Museum Camp


Dear Folks,

I just got back from Museum Camp in Santa Cruz, and I wanted to tell you about it, and show you some pictures I took there.

First off, the "official" title of Museum Camp was "You Can't Do That in Museums Camp" or the somewhat edgier alternate title of "Hack the Museum Camp."  Anyway, whatever you call it, the Camp was launched by Nina Simon (a museum rock star, if there ever was one) at the museum where she is the director, the MAH (aka The Santa Cruz Museum of Art & History, pictured below.)


Nina invited me to come to Museum Camp and be a "counselor."  (More on that later ...) Just like summer camp there were campers and counselors --- some of the campers even slept on the floor of the museum in sleeping bags, but I got to share a house with some of the other counselors --- museum "rock stars" in their own right.

Just getting to be part of the same event with fellow counselors like Maria Mortati, Eric Siegel, Julie Bowen, Jason Jay Stevens, Dan Spock, Kathy McLean, Darcie Fohrman, Kevin von Appen, and Merilee Mostov was big fun.  (Also the Camp counselors brought a lot of professional horsepower to the enterprise.)


So the big idea of Museum Camp was this: bring together about 75 people (Campers and Counselors) for two-and-a-half days, break them up into 15 counselor+camper teams, let them choose from 20 or so museum collection objects, and then have an entire exhibition ready for the public opening party!   So check-in on Wednesday and check-out Friday night after the exhibition party.

Woohoo!  The perfect high-stakes, high-pressure antidote to the usual museum whining ("we don't have enough time, we don't have enough money!" ) And honestly, miraculously, it all came together --- there were 15 exhibits lined up with bright, shining faces to form an entire exhibition.  A wild, eclectic exhibition, but everyone delivered the goods!

So how did this all shake down schedule-wise?  Everyone checked in starting Wednesday morning (since I was a counselor, I got a whistle!) and we had a series of workshops throughout the afternoon related to exhibit development topics like prototyping, writing prompts, emotionally-engaging exhibitions, etc.  (I got to do a workshop on becoming an "Office Supply Ninja" prototyper!)


After a scheduled "siesta" (really --- it is Santa Cruz after all!) we played a game to choose the artifact (or artifacts) that each team would use as the basis of their exhibit.  After that was sorted out and after a delicious group dinner (with carefully delineated vegan and gluten-free options --- still Santa Cruz, right?) we used the time between 8pm and midnight on Wednesday to lock down the initial "Big Idea" and crank up the concept and development phase of our project.  Knowing that everything had to be ready to go before the Exhibition Opening Party at 5pm on Friday didn't leave much time for monkeying around (which was good!)


So let me tell you about our team, Team #10 (aka "Perfect Ten.")  My three team members were super!  Diana Kapsner is a staff member at MAH --- it was great to have a "local" on our team when we looking for materials and resources!  Emily Black Fry works at the Nelson-Atkins Museum of Art in Kansas City --- she had tons of great ideas and enthusiasm.  And last, but not least, Karli Kendall from the Red Deer Museum, in Alberta Canada --- Karli was definitely our "organizer" but in a good way!


The "Perfect 10" team chose a large (7 feet wide by 6 feet tall) painting by Joseph De Giorgio, entitled Oceanside No. 8. (Pictured below, but it looks better in real life.)   I'm no art historian, but I liked it, and it used a sort of pointillist approach which led directly to our team's "Big Idea" namely, "One Painting, Many Points of View."


So my way of describing the idea(s) behind our team's exhibit would be that we wanted to reward visitors for being careful observers of Oceanside No. 8, and that we also wanted to give visitors many multi-sensory ways to look at the painting more than once, and to experience the painting in different ways.  We set out to do this by creating a physical "beach scene" tableau complete with beach chairs, cooler, table, etc. set up in front of the painting.  Objects you might expect to find at the beach would all be used to allow visitors to experience this one painting from many different points of view.


Then it was just hard work! Pulling materials together and editing down our ideas, our team pretty much worked from Thursday morning up until midnight.  It was a loooong day!  I think it helped that our team conversations were honest, but respectful, even if we pushed back on each others' ideas now and then.  I think my role was less counselor as "exhibit Yoda" but more as an equal team member (albeit with a bit more museum exhibit development experience!)  I think we all left with a clear sense of what we needed to accomplish in the few hours remaining on Friday and how we could work together to do it.

I don't think any of our team felt stressed at all when we gathered together Friday morning.  We articulated the things we "had" to finish, as opposed to the things we'd "like" to finish so we had a clear sense of our priorities.


I'm really proud and happy with where we ended up with our team's exhibit. I feel that the Big Idea is a strong one, and that we gave visitors many ways (sights, sounds, smells) and reasons to engage with De Giorgio's painting.

Would I have done anything differently with Museum Camp?  Not much actually.   I might have added one more day to the process,  and also added an optional mid-day activity to break up the intensity of the long day(s) of work.

Also we spent a lot of time talking about "taking risks" and making "risky experiences."  I'm still not sure what that means exactly.  In the end, I think notions of "risk" became a bit of a distraction to the exhibit development process at Museum Camp.

So would I participate in Museum Camp again?  In a heartbeat!  It definitely reinforced some of my ideas about "quick and dirty" prototyping, but also stretched me professionally in thinking about new and different ways to twist the "traditional gallery experience" in more visitor and community-centric ways.  (Also, I'm sold on the idea of installing more beach chairs inside Art Museum galleries!)


Don't miss out on any ExhibiTricks posts! It's easy to get updates via email or your favorite news reader. Just click the "Sign up for Free ExhibiTricks Blog Updates" link on the upper right side of the blog.

P.S. If you receive ExhibiTricks via email (or Facebook or LinkedIn) you will need to click HERE to go to the main ExhibiTricks page to make comments or view multimedia features (like videos!)

Wednesday, February 20, 2013

ReWind: ELVIS the Prototyper 2.0


The past few years I've been fortunate to work with the students in the Exhibition Design Master's program at FIT (The Fashion Institute of Technology) in Manhattan.

My presentations always cover one of my favorite, but often overlooked, design topics: Prototyping! 

In my opinion, most exhibit design misfires could be prevented by more thorough prototyping at the beginning of the exhibit development process.


In addition to warping the minds of these young up-and-coming exhibit designers with my corny jokes and some rapid/cheap prototyping exercises using paper and masking tape,  part of my presentation also dealt with how to use the word ELVIS as a mnemonic (memory aid) for exhibit designers when they are developing prototypes.  I've updated the "I" in ELVIS, so consider this "Elvis the Prototyper" 2.0


 E = Everyday Materials
Using everyday materials makes it easier to prototype AND maintain exhibits.  I'd much rather spec something from McMaster-Carr or the local Radio Shack that does the job, rather than creating a custom component that will be tricky to replace later on.

L = Looseness
Providing open-ended opportunities during exhibit development and for the visitors.  The best exhibits (and exhibit developers!) are not one-trick ponies, they are wired up to allow multiple successful outcomes.

V = Vermicious
The word means "wormy." Good exhibits and prototypes should "worm around" your head on many different levels: old/young, art/science, beginner/expert.  If you can find a way to conceptually and actively "hook" your visitors, they'll remember your exhibits.

I = Iteration
Try, try again!  There's no such thing as a prototype that's "perfect" the first time.  Try your ideas out with people, think about what you've found out, then change your prototype for the next round of exhibit (or label or programming or whatever) testing.


S = Sharing
We should be sharing ideas with our visitors, and each other as professionals.
In that spirit, don't forget to check out The Great Big Exhibit Resource List, a free compendium of great resources for designers, makers, AND prototypers.

Don't miss out on any ExhibiTricks posts! It's easy to get updates via email or your favorite news reader. Just click the "Sign up for Free ExhibiTricks Blog Updates" link on the upper right side of the blog.

P.S. If you receive ExhibiTricks via email (or Facebook or LinkedIn) you will need to click HERE to go to the main ExhibiTricks page to make comments or view multimedia features (like videos!)