Friday, January 29, 2010

Museum Exhibit Design Toolkit: An Erector Set for Grownups


Here's a quick one to explore:

80/20 Inc. is a company that sells aluminum T-slotted framing that they call "The Industrial Erector Set."

And just like an erector set, the 80/20 pieces let you quickly put together 3-D realizations of your exhibit designs. Since the T-slotted framing sections assemble quickly, changes are much easier to make than welded frames, so the system is also great for playing around with physical prototypes.

Check out the 80/20 website for images of project examples!

Don't miss out on any ExhibiTricks posts! It's easy to get updates via email or your favorite news reader. Just click the "Free Updates" link on the right side of the blog.

P.S. If you receive ExhibiTricks via email (or facebook or LinkedIn) you will need to click HERE to go to the main ExhibiTricks page to make comments or view multimedia features (like videos!)

Saturday, January 23, 2010

Exhibit Graphics Toolbox: Shape Collage


Shape Collage is a great FREE on-line (or downloadable) software tool that lets you arrange pictures from your computer (or online photo stashes) into shapes or words.

Even better, Shape Collage lets you tweak the shapes, backgrounds, clickability of images as much as you would like. (The image at the top of this posting gives you a simple example of some of the interactive features.)

This is a great application that definitely goes into my Exhibit Graphics Toolbox!

Don't miss out on any ExhibiTricks posts! It's easy to get updates via email or your favorite news reader. Just click the "Free Updates" link on the right side of the blog.

P.S. If you receive ExhibiTricks via email (or facebook or LinkedIn) you will need to click HERE to go to the main ExhibiTricks page to make comments or view multimedia features (like videos!)

Tuesday, January 19, 2010

Exhibit Design Toolkit: Off The Shelf


Sometimes (especially in these tricky economic times) adapting a well-designed "off the shelf" item to an exhibit purpose can be a real budget saver. Whether to provide an additional tabletop interactive in a larger exhibition, or as a collection of simple, portable exhibits for outreach, I've found the items listed below to provide good foundations for simple open-ended exhibit components.


Each idea below is followed by a short example set-up description and relevant web link(s). All the materials (including laminated graphics/labels) can easily fit into standard-sized plastic storage bins with resealable lids.
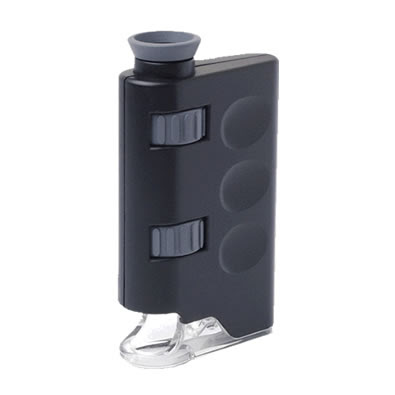

1) Mini-microscope

These hand-held microscopes are great! They are battery operated (buy rechargeable!) and can be used with flat(ish) materials like fabrics, papers, etc. Also you can make your own “slides” with a business card sized laminator.


2) CITIBLOCS

Just put out a batch of CITIBLOCS on a flat surface and stand back! People of all ages love them. There are also Kapla Books and cards that have nice images of block projects to get people started.
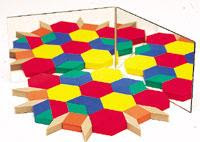


3) Mirrors/Symmetry

Make, or buy from ETA, small rectangles of plexi mirror (with rounded corners!)


Then use Duncan Birmingham’s books, like M is for Mirror, as references to create your own laminated symmetry activity sheets.


Lastly, Pattern Blocks (also from ETA) make a great exhibit with two fixed plexi mirrors at 90 degrees to each other.


4) Geoboards

Buy a set of 10 WOODEN geoboards, but only put out three or four at a time. Include some colored rubber bands and watch the cool artistic AND mathematical patterns kids make!
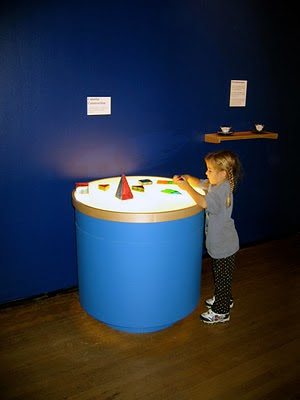

5) Magna-Tiles

Use the translucent Magna-Tiles to allow visitors to create both 2-D and 3-D patterns that are like playing with stained glass. If you can throw a light table, or back-lit piec e of milky acrylic into the mix (as in the picture below) so much the better!


6) Moiré

Use “found objects” such as strainers, perforated metal, window screen, to create a Moiré Discovery Kit. You can also laminate downloadable moiré patterns here.


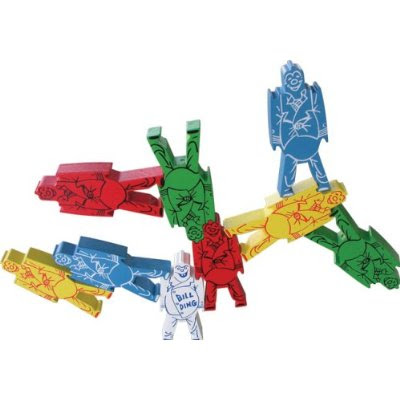
7) "Bill Ding" Acrobat Blocks

Buy a set or two of "Bill Ding" acrobatic blocks for visitors to use. The clever design of these blocks allows folks to not only explore pattern making, but physical principles related to balance, gravity and symmetry as well.

8) 3-D Images

Get several sets of “Proview” 3-D Glasses from the Rainbow Symphony Company. Then laminate 3-D images of your own choosing. NASA has free images you can download of Earth, Mars and the Sun , for example.


See the NASA links and other 3-D resources at this page on Rainbow Symphony’s site.


9) Tuning Forks Station

NASCO sells nice tuning forks and accessories. Buy a variety, but just put out three or four different sizes at a time. You will also want to get a large “rubber pad” or large rubber “activator” for kids to strike the forks on to get them to vibrate. (The idea is not to strike the tuning forks on themselves or other hard objects!)


Other props for this station include a shallow round Tupperware container filled with water to create sound “waves”. Also, a suspended strip of Mylar or Tyvek paper can show the air being moved by tuning fork vibrations.


10) Mazes/Marble Runs

Buy a nice selection of Cuboro wooden marble runs.

Big fun! And great three-dimensional thinking/planning skills.


What "off the shelf" exhibit solutions or resources have you found? Let us know in the "Comments" section below!


Don't miss out on any ExhibiTricks posts! It's easy to get updates via email or your favorite news reader. Just click the "Free Updates" link on the right side of the blog.

P.S. If you receive ExhibiTricks via email (or facebook or LinkedIn) you will need to click HERE to go to the main ExhibiTricks page to make comments or view multimedia features (like videos!)

Thursday, January 14, 2010

Exhibit Design visits The Circus


Lions and Clowns and Acrobats, Oh My! I just finished the installation of an interactive children's art exhibition called "Under The Big Top" at the Nassau County Museum of Art. (Here's a Flickr set of some of the installation images.)

One thing I've been pondering about the "Under The Big Top" exhibition is how the inclusion of thematically-focused interactive components that require physical engagement (as well as a few exhibit installation "easter eggs") in a traditionally "hands-off" context, like an Art Museum, can, paradoxically, foster the types of behaviors (like careful observation and imaginative play) that we would like to see in every type of museum installation.

Two examples of interactive components from "Under The Big Top" that provide a nice intersection between the circus-themed works of art and an opportunity for visitors to experiment with artistic concepts like form and color are:

• Acrobat blocks
Here visitors get to create their own colorful patterns using these cleverly designed "acrobat blocks." A simple "circus ring" on the table adds to the opportunity for visitors to create wonderful sculptural forms in a "Big Top" context.


• Colorform Clowns
With this exhibit, visitors can experiment with form and color by putting "makeup" (actually cling vinyl nose, eye, and mouth shapes) on the mirrored clown faces.


There's also a cool little "easter egg" lighting effect that shows a shadowy version of the colorform clown faces reflected onto the floor in front of the Colorform Clowns exhibit as well.


All the exhibits in "Under The Big Top" are simple, low-tech (no tech!) and open-ended opportunities for visitors to engage with both Circus and Art themes.

And best of all, the activities leave visitors in a curious, observant mood that is a perfect complement to viewing works of art. (As opposed to bouncing around like pinballs --- which seems to be the effect many science center exhibits have on kids ...)

The experience of putting together the "Under The Big Top" show has made me think even more carefully about the exhibit design possibilities of coupling "hands-off" museum objects with related "hands-on" museum experiences.

What are your experiences with integrating hands-off with hands-on? Let us know in the "Comments" section below.

Don't miss out on any ExhibiTricks posts! It's easy to get updates via email or your favorite news reader. Just click the "Free Updates" link on the right side of the blog.

P.S. If you receive ExhibiTricks via email (or facebook or LinkedIn) you will need to click HERE to go to the main ExhibiTricks page to make comments or view multimedia features (like videos!)

Tuesday, January 5, 2010

Text and the Web: Readability and Instapaper


I thought I'd share two great apps that make reading text on the Web easier (and cleaner, design-wise) given that one of my 2010 Designer Resolutions is to look for ways to simplify my projects.

The first is a browser app from arc90 called Readability. As the name implies, Readability makes it easier to read web pages. After you install the app into your browser's toolbar, a simple click removes all the extraneous visual garbage, like ads and crazy graphics, from the webpages you read and leaves you with simple text. Readability is simple, free, and adjustable to suit the way you'd like your text to look. I wish there was a real-life version of Readability to use with overblown museum graphics and labels!

The second app is called Instapaper (available in both Free and Pro versions) and it lets you quickly save Web articles to read later in an uncluttered text format with the push of a button (actually a bookmarklet you install in your favorite browser.) Instapaper goes one step further by letting you save those same text-based Web articles to your iPhone or iPod touch to read later (or on the bus or the train.)

Both Instapaper and Readability make it easier and more convenient to manage the avalanche of text-based information available on the Web. Many people have bemoaned "the death of print" since the boom in online newspaper sites and the introduction of e-readers like the Amazon Kindle, but maybe we just need to reconsider "reading" to find ways to shift some of our text-based information gathering onto our ubiquitous electronic devices.

Don't miss out on any ExhibiTricks posts! It's easy to get updates via email or your favorite news reader. Just click the "Free Updates" link on the right side of the blog.

P.S. If you receive ExhibiTricks via email (or facebook or LinkedIn) you will need to click HERE to go to the main ExhibiTricks page to make comments or view multimedia features (like videos!)